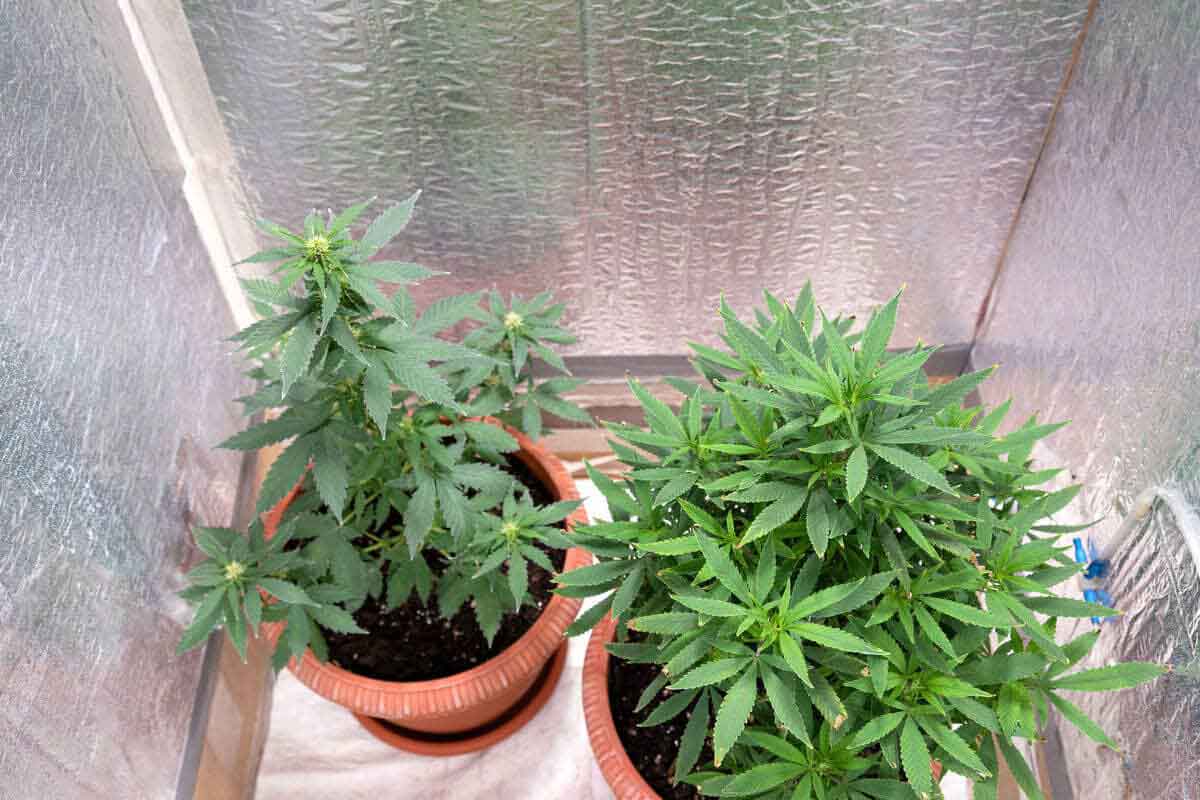
You get one of the seed banks that you send to Canada and USA when you grow Cannabis yourself and make it certain that you can create the optimal conditions for your Cannabis to flourish. Many Cannabis growers do this usually by making their DIY growing tent or growing box. At the same time, this may sound not easy, and it’s something you can accomplish with a little thought and energy regardless of how you live. This journal is all about exploring eight steps in making your DIY Grow Box and how to do them efficiently.
Procedure One: Materials
Products can depend on the size of the container you wish to be. Though, on this occasion, the container was 36″ tall x 21.5″ long x 21″ deep to accommodate starting plants as well as those reaching a maximum elevation of 27.” If you want to create a bigger box, of course, refer to the supplies below. No special equipment, use a drill, knife, circular saw, tape measure, and square are needed. If this is your first time encountering electrical gears, a multimeter would be a great help.
Here below are the following supplies:
- Cooling fans (2 pcs.)
- Plywood ¼” (1 pc.)
- Speed Controller (1 pc.)
- Hinges (2 pcs.)
- Thermostat (1 pc.)
- 10′ of 2″ x 4″ (basic frame intended)
- Wood Screws .26″ (8 pcs.) for your Hinges
- Wire nuts (a handful)
- Wood Screws 2″ estimated (30 pcs.)
- Electrical Wire 26″ Red 16 Guage
- Electrical Wire 3 prong (you can recycle used wires from your appliances)
- Lighting
- Electrical Wire 26″ White/Green 16 Guage
- 1-1.25″ Deep Handy Utility Box (3)
- Electrical outlet (1 pc.)
- 24″ Black 14 Guage Electrical Wire
- Light switch (1 pc.)
- Underfloor Heating Foil / Foil Tape / Simply Aluminum Foil 2″ x 4″ x 8” (2 pcs.)
You might want to include a little or huge amount of creativity for better results.
Procedure Two: Set up your Frame
You can easily find good references in setting up your frame. Reliant on how wide you desire it to become, essentially frame a cube—steadied up the angles when moving to avoid any swaying. You framed the upper rear end of the container that will grip the electrical shifts and switches and wrapped it away through the growing part below.
Procedure Three: Include the Door, Sides, Top as well as Bottom
Calculate and trim what was required. Use a screw to attach the left, bottom, right, as well as back. The front had the door, and that one sole cut was made to the top, the hinges were added, and the door was done. The container’s top portion has two detachable sections, one of which allows for the front overlooking area as well as light alteration as well as the other contact to your power generating switches.
Procedure Four: Reflective
It’s an excellent time to add it now to use of any kind you reason to be best or what is convenient for you. You might want to use some Heating Foil for your underfloor, and used it all over when you could, as you hold heat, to redirect light, as well as to cover the internal of the package. You might ultimately run out of some supplies, but you can benefit from secondhand Aluminum Foil to prepare the door’s inside.
Procedure Five: Holes for Fans
Use some fans for cooling. You can purchase a kit consisting of two fans alongside one thermostat for configuring the on and turn off its preset temperatures. The kit can easily be used since it does not require wiring, and once you plug it through USB, it is ready for usage.
The size of the fans can create a circular hole on one side’s lowest back angle about 6″, and the lowermost part will aid as the cold air opening. Make the second circular hole to the reverse side over the top, placed in the forward-facing position of the container to aid as air exhaust.
Procedure Six: Sand and Stain (Now or Later)
You can accomplish this any time you want, but it is best to do this before placing your wires inside as well as your fans. Making it a water-resistant container would be the best choice for you and your plants.
Procedure Seven: Install Electrical
It wasn’t as challenging as most people might think. Here are some procedures you might benefit from:
Fans: Mount the fans. Those intake fans placed on the lowermost part have to be facing inside and allowing them to pull in the outdoor air and drive it inside the container. These exhaust fans will suck the air, driving it to the container’s exterior and for it to accomplish its purpose secure that the fans are facing out.
For Light Switch: You can use a light switch that can serve as the central control for your whole grow box.
Install Power supply and Junction Box: Make a centralized wire here and placed your power supply alongside.
Outlet: Basically, this is the attachment place for your thermostat, and you can create extra outlets if you are planning on adding secondary or tertiary light or wanted to include anything.
For wiring, you might want to ask your trusted electrician to run diagnostics, or you can watch educational videos discussing these things.
Temperature Sample: You will find a minor probe linked to your thermostat. You can drill a tiny hole in your electrical box’s floor and placed the probe inside. By tying it off in the electrical box, you can alter wherever the probe rests in the box.
Lights: You can drill a tiny hole at the top front portion of your container to allow a passageway for wirings coming from your power supply. It can make an access and changing the lights from the maximum point to the lowest can be a lot easier. You can use HE lights and it consumes about 45 watts, which are fitted for your grow box. However, if you are thinking of using LED lights, might I warn you that it comes a little pricy, though, they might be rewarding along the process.
Settings: When you have found out that your plant you would like to set in and the appropriate temperature series, set the thermostat, then your work is done.
Procedure Eight: Lock and Grow
For safekeeping and new aesthetics, you can add a door lock to your Grow box.
Some reminders:
It appears to be effective with tiny plants. The one responsible for making my plants leggy is the lighting itself, which can be addressed by making this kind of Grow box.
Issues with temperature such as too cold or too hot were both nonexistent. The lights keep the container warm, and the fans start right away, blowing fresh air as it corresponds with the preset temperature.
You might experience trouble in drying out. Fans can accumulate water and let it dry without serving its purpose. Check regularly your irrigation system or even improve if you already have one. For future reference, you can attach LED lights, as well as you can create your homemade hydraulic system.
May this article served its purpose of educating you by providing practical and helpful guides in making your DIY Grow Box.


